HANA Export and Import option allows tables, Information models, Landscapes to move to a different or existing system. You do not need to recreate all tables and information models as you can simply export it to new system or import to an existing target system to reduce the effort.
This option can be accessed from File menu at the top or by right clicking on any table or Information model in HANA studio.
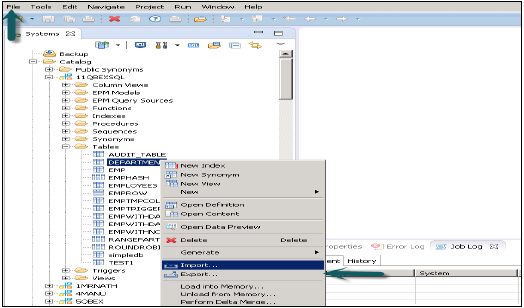
Exporting a table/Information model in HANA Studio
Go to file menu → Export → You will see options as shown below −
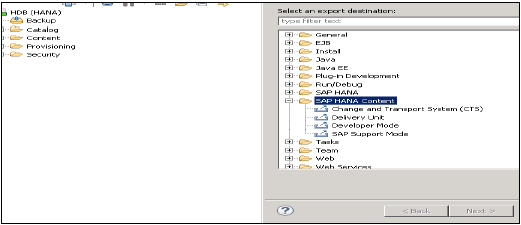
Export Options under SAP HANA Content
Delivery Unit
Delivery unit is a single unit, which can be mapped to multiple packages and can be exported as single entity so that all the packages assigned to Delivery Unit can be treated as single unit.
Users can use this option to export all the packages that make a delivery unit and the relevant objects contained in it to a HANA Server or to local Client location.
The user should create Delivery Unit prior to using it.
This can be done through HANA Modeler → Delivery Unit → Select System and Next → Create → Fill the details like Name, Version, etc. → OK → Add Packages to Delivery unit → Finish
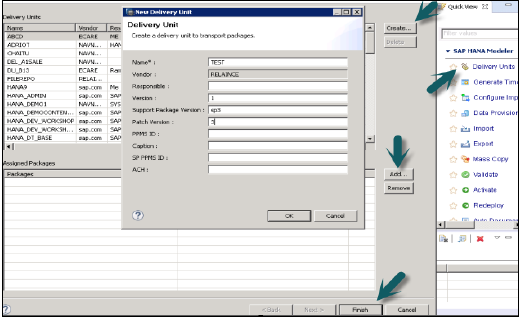
Once the Delivery Unit is created and the packages are assigned to it, user can see the list of packages by using Export option −
Go to File → Export → Delivery Unit →Select the Delivery Unit.
You can see list of all packages assigned to Delivery unit. It gives an option to choose export location −
- Export to Server
- Export to Client
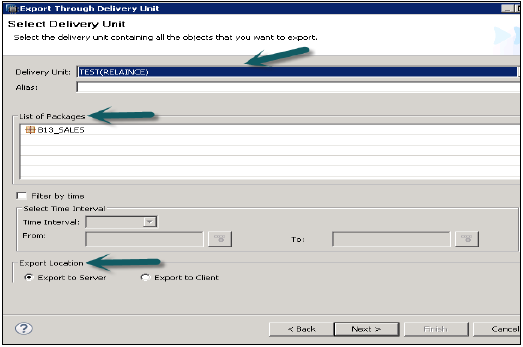
You can export the Delivery Unit either to HANA Server location or to a Client location as shown.
The user can restrict the export through “Filter by time” which means Information views, which are updated within the mentioned time interval will only be exported.
Select the Delivery Unit and Export Location and then Click Next → Finish. This will export the selected Delivery Unit to the specified location.
Developer Mode
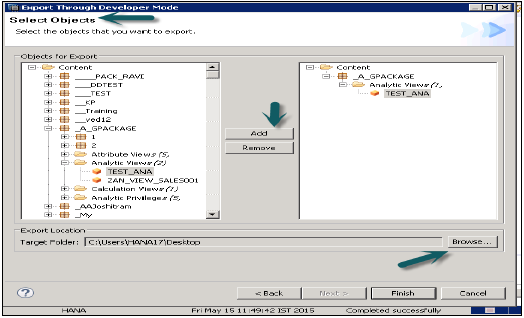
This option can be used to export individual objects to a location in the local system. User can select single Information view or group of Views and Packages and select the local Client location for export and Finish.
This is shown in the snapshot below.
Support Mode
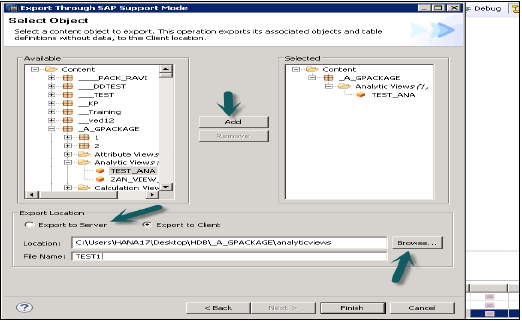
This can be used to export the objects along with the data for SAP support purposes. This can be used when requested.
Example − User creates an Information View, which throws an error and he is not able to resolve. In that case, he can use this option to export the view along with data and share it with SAP for debugging purpose.
Export Options under SAP HANA Studio −
Landscape − To export the landscape from one system to other.
Tables − This option can be used to export tables along with its content.
Import Option under SAP HANA Content
Go to File → Import, You will see all the options as shown below under Import.
Data from Local File
This is used to import data from a flat file like .xls or .csv file.

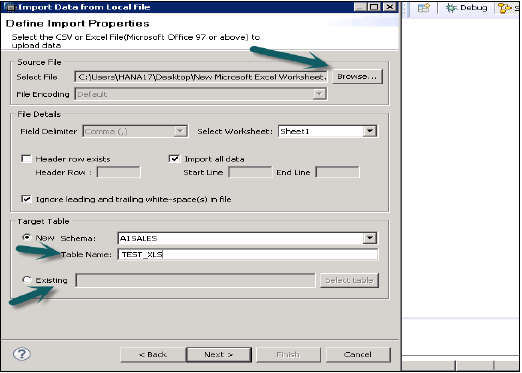
Click on Nex → Choose Target System → Define Import Properties
Select Source file by browsing local system. It also gives an option if you want to keep the header row. It also gives an option to create a new table under existing Schema or if you want to import data from a file to an existing table.
When you click on Next, it gives an option to define Primary Key, change data type of columns, define storage type of table and also, allows you to change the proposed structure of table.
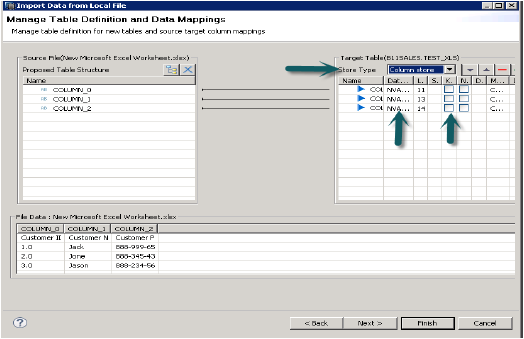
When you click on finish, that table will be populated under list of tables in mentioned Schema. You can do the data preview and can check data definition of the table and it will be same as that of .xls file.

Delivery Unit
Select Delivery unit by going to File → Import → Delivery unit. You can choose from a server or local client.
You can select “Overwrite inactive versions” which allows you to overwrite any inactive version of objects that exist. If the user selects “Activate objects”, then after the import, all the imported objects will be activated by default. The user need not trigger the activation manually for the imported views.
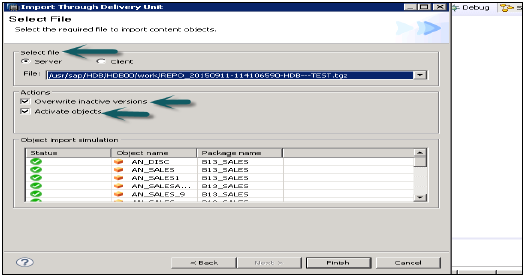
Click Finish and once completed successfully, it will be populated to target system.
Developer Mode
Browse for the Local Client location where the views are exported and select the views to be imported, the user can select individual Views or group of Views and Packages and Click on Finish.
Mass Import of Metadata
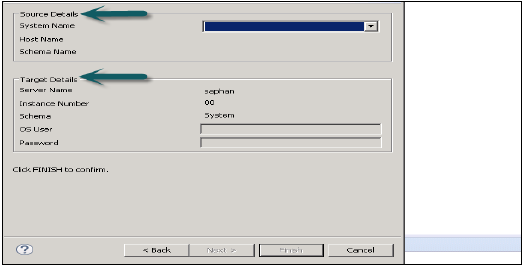
Go to File → Import → Mass Import of Metadata → Next and select the source and target system.
Configure the System for Mass Import and click Finish.
Selective Import of Metadata
It allows you to choose tables and target schema to import Meta data from SAP Applications.
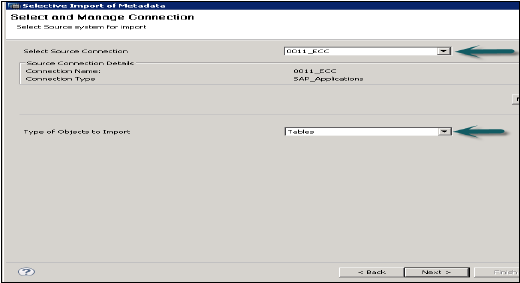
Go to File → Import → Selective Import of Metadata → Next
Choose Source Connection of type “SAP Applications”. Remember that the Data Store should have been created already of type SAP Applications → Click Next
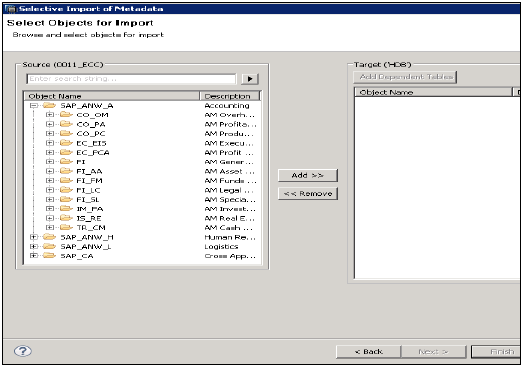
Select tables you want to import and validate data if required. Click Finish after that.



0 Comments:
Post a Comment